The Big Reveal
It took two weeks from start to finish, but we are ready to show the big reveal of our wallpaper project!
First, I have to give a very big thanks to Terry Ashby of The Cutting Edge wallpaper service. Thanks to him, the process was easy and efficient, and we are so pleased with the results!
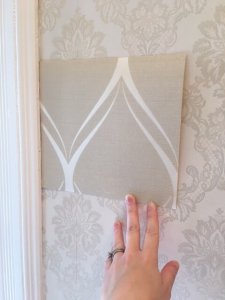
One of our worries upon starting this project was how the old wallpaper would come down. I’ve done quite a bit of wallpaper removal myself, and you just never know how the process will go. I was fairly confident that most of what was on plaster walls would come down just fine. We knew there were several drywall additions, though, and I was suspicious that at least one area had multiple layers of paper to get through.
In just two days, though, all the walls were ready for priming. Jonathan and I tackled that chore. Once that was done, we also painted the bottom half of the walls with the new color we had already selected. We knew it was important to get all of out painting done ahead of the paper installation. That way, there was no need to worry about painting near, or splattering on, the new wall covering.
-
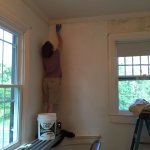
- Putting on the prime coat – Yes, that’s a scary corner to paint!
-
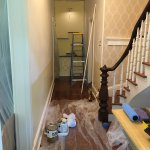
- Still a little bit of chaos – prime coat and bottom color on while new wall paper install begins!
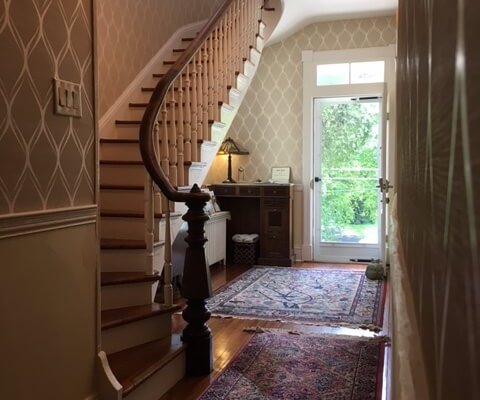
Terry and crew were able to install like the wind after that. In just two and a half days, they transformed the space. Finally, my in-house carpenter (AKA, Jonathan) was able to install the chair railing, and just like that, our lovely lady now looks stunning in her new dress!
-
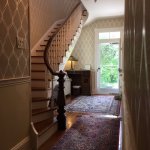
- Here’s the big reveal – Welcome to our new front hallway!
-
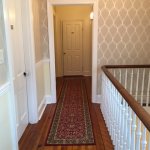
- The second floor hallway – Waypoint House B+B
More updates to come
In other news, there continues to be great progress on the new roof. We’ve only lost a couple of days of work due to poor weather, and the crew is currently working on the south side of the house which will be the easiest section as there are no angles or valleys to contend with. I’m still very eager for the copper accent roof on the bay window to go on, but I know my patience will be rewarded, and I’m looking forward to sharing that update with everyone soon.