Waypoint House

Address: 211 S Church St. Berryville, Va    Reservation Line: 540-955-8218

Projects

Arts and Crafts Day: Fun with Architectural Salvage

This weekend Jonathan and I had a chance to get out of the house for a bit and do a little treasure hunting.  Once we found our treasures, we got to have a fun arts and crafts day.  We love anything DIY.  We kind of can’t help ourselves.  It’s a bit of an addiction.

We had heard of a store in Front Royal that bought and sold old architectural house pieces.  We’d wanted to get there for some time, and this past weekend was our chance.  Once there, looking at all the wonderful, historic pieces our minds began to swirl.

We had a vague idea that we wanted to update some of the art in the rooms and maybe incorporate a three dimensional piece.  We must have come up with a half dozen or more ideas while we browsed the aisles of the big, chilly warehouse, but finally we decided upon an idea and proceeded to just purchase one item for the time being.  Often, we find ourselves mired in more than one project at a time and ultimately we felt now would not be a good time to get bogged down.  One, simple, do-able project seemed fine to us!

However, as we are prone to do, one crafting project turned into two.  Okay, turned into three.

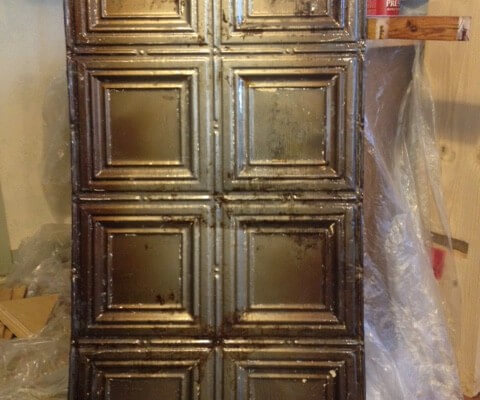
Let’s break this out.  So, the fun piece we bought at Architectural Old House Parts was a beautiful piece of tin that had once been part of a ceiling.  Nearly all the paint had come off the piece as it had never been properly primed before painting.  Good for us!  And it only had a bit of superficial rust that could easily be cleaned off.  All in all, the look and wear on the piece was quite wonderful.

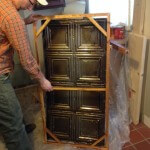
Jonathan scrubbed it with some steel wool which got most of the rust and then we gave it a quick wash and dry.  Finally, we applied a rust inhibitor to the tin. With some lumber from the garage, Jonathan built a frame for the back.  All that’s left to do now is attach the tin to the frame and then we can hang it on the wall.  We think this will be a great piece in our parlor.

The second project for the weekend started out as a simple fix-it.  I have a full length mirror in one of the guest rooms, and I noticed last week that one of the legs had developed quite a nasty crack.  After Jonathan examined it, he determined he could get it to hold back together, but that the best course of action would be to look for a new mirror.

I started a Google search, trying to locate a similarly sized piece, when it occurred to me that we had an unused mirror stored in the garage.  When we updated the Shore Room in the winter of 2013/2014 we removed a long antique mirror from above the old “headboard” in the room.  The frame had come apart from it, and we had planned on donating the mirror, but hadn’t yet done so.  Could we make our own new frame, I asked Jonathan, and use this as our new floor mirror?  Well, after a quick inventory of the rest of the lumber, he found some pieces that were actual beams from the house from when we remodeled the kitchen ceiling in winter 2012!  Win, win, win!  Free mirror made with pieces already from the house.  A perfect reuse and recycle opportunity.

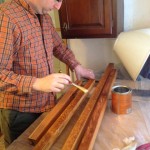
Jonathan and his trusty table saw made a channel in the wood beams to frame out the mirror and he coated the wood in clear polyurethane.  Once the poly dries, he’ll assemble the frame to the mirror.

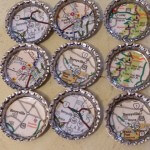
Our final crafts project for the weekend was a fun little thing I had wanted to get to for a while.  I get lots and lots of maps here so that I can keep them available for guests.  The Virginia Department of Transportation is great at sending those out upon request.  Not too long ago I got some updated versions, so I had a pile of old maps.  I thought, what if I could create a fun little souvenir for our retail shelf using the Berryville bit of the map?  So, I purchased a few craft supplies to make cute magnets and key chains.  Once the map parts are cut to size, they are sealed with a simple Mod Podge glue.  The same glue is used to adhere the maps into the magnet base – a bottle cap, in this instance.  The final step will be to mix and pour a jeweler’s resin into the cap which will actually magnify the image underneath a bit.

So, we are about three quarter of the way done with all three projects.  Not bad for one weekend!  I’ll show you all the finished projects really soon, but for now, here are a few working photos to spark your interest.


A Busy Fall!

So, here’s the truth guys: I’m terrible at blogging because one little technical glitch and I become a complete idiot with regards to all things computer.  Yes, I was having technical issues with the posts and so that’s one of the main reasons for the long delay between updates.  That and we had a tremendously busy summer and fall so far!  Which, of course, we are extremely grateful for. So here’s the fall update for 2014.

We did finally get our summer Deck Beautification Project completed.  I think I mentioned in my last post we were getting ready to tackle that, but we were waiting on the dove family to hatch a set of eggs.  You see, a pair of doves decided that the eaves of the back porch was a perfect place for their nest.  Well, they hatched not one, not two, but three sets of chicks this summer!  They have moved on for the season, so we proceeded with our update project.

The first order of business was to finish off the ceiling.  Once that was done (leaving the opening for the dove family, of course) we added a ceiling fan and festive lighting. We also painted the back wall to match the house color.  Finally, we replaced a few boards in the deck and then put on a new coat of paint on.  We’re very happy with the upgrades as it makes an already relaxing spot even more enjoyable now.

While we were at it we added a fresh coat of paint to the front deck as well.  A nice fresh coat of paint can make a big difference and we also used a paint with an anti-slip additive as an upgrade.  Safety first, guys!

Have a great week everyone and I hope you can come visit us soon!

-Rachael


Open for Business! Our Renovation Reveal

We made it!  We worked up until the very last day, but were ready for our re-opening on December 30, and graciously welcomed our guests!  What a delight to finally make our renovation reveal! We had a terrific New Year’s Eve and served a delicious breakfast the next morning to a boisterous crowd around the breakfast table.  We are so grateful and would like to wish everyone a very happy 2014!  Come visit us this year!

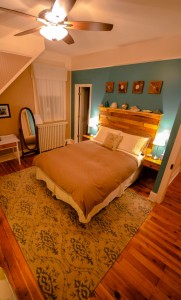
I’ll have more photos to post in the days to come, and of course the room pages on the website will be updated, but I know Jonathan is going to want to obsess over just the right angle and just the right lighting for a while!  For now, here is a photo of the updated Shore Room, which is the one I have been dying to show you all.

Renovation reveal - The newly updated Shore Room

Renovation reveal -The newly updated Shore Room

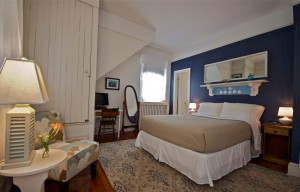
Remember what it looked like before?

Shore Room

Shore Room

Six weeks seemed like a lot of time in the beginning, but in the end it went by very quickly.  The list of things we got accomplished is long.  Shall we do an accounting?  Here we go:

  • Removed two old oil tanks; Replaced with one large, new tank
  • Removed old boiler; Added new, energy efficient boiler
  • Created a dual zone heating system to heat the guest section of the house separately from the owners’ quarters
  • Replaced valves to all radiators so all of them now function!
  • Repaired/re-pointed foundation of house
  • Repaired Front Porch, including replacing several rotting beams
  • Removed old metal roof on porch and replaced with new, custom metal roof
  • Re-routed and replaced guttering on front of house to direct water away from the porch
  • Removed old floor in back entry; Added new joists and insulation and re-floored
  • Insulated and added new dry wall to basement entry room
  • Removed and replaced basement stairs
  • Removed florescent lighting fixture in back entry/laundry room and replaced with new LED down lights
  • Relocated washer and dryer from old closet to the back entry room; added new plumbing to accommodate this relocation
  • Created a new pantry area from the old washer closet
  • Removed all aging smoke detectors and replaced with new smoke/carbon monoxide detectors – six in total
  • Removed window casings from Shore Room; Removed old window counterweights, and insulated weight well
  • Removed all paint layers from window casings, repainted and put back in place
  • Removed and replaced toe kick in Shore Room
  • Stripped and repainted baseboard molding in Shore Room
  • Removed old flimsy closet shelves in Shore Room and replaced with a custom built system
  • Re-secured bead board to walls in Shore Room where needed
  • Repaired plaster cracks in Shore Room
  • Removed wall paper from headboard wall in Shore Room
  • Repainted Shore Room, top to bottom.
  • Re-positioned ceiling fan junction box to center of room in Shore Room, removed old ceiling fan and replaced with a new ceiling fan.
  • Refinished floors in Shore Room
  • Built a new, custom headboard for Shore Room
  • Removed wallpaper from accent wall in Traveler’s Retreat
  • Repainted Traveler’s retreat, top to bottom
  • Removed wallpaper in Traveler’s Retreat bathroom
  • Repainted Traveler’s Retreat bathroom
  • Added a polyurethane coat to wood bath surround and vanity cabinet in Traveler’s Retreat bathroom
  • Added a new tile step-out area in front of the shower in Traveler’s Retreat bathroom
  • Added new, LED down lights above shower and tub areas in Traveler’s Retreat bathroom
  • Repaired plaster cracks, second floor hallway
  • Removed and replaced toe kick, second floor hallway

Quite a list when you look at it that way!  We are looking forward to a great birthday year for the house.  We think we gave her a good start and we look forward to having everyone come visit us soon so you can see all of this for yourselves.

I’ll keep posting in the weeks to come.  We have a few more details to finish out (remember those new lighting fixtures for the Traveler’s Retreat bathroom I mentioned?) so stick around.  It’s going to be a great year!

-R